Greg Corke gets hands-on with a new browser-based tool for presentations and collaborative design review that places a big emphasis on visual quality and has a one-click workflow from Revit, SketchUp, Rhino and 3ds max
There are a whole host of AEC collaboration tools out there, but most place an emphasis on geometry and BIM data rather than visual fidelity. At the same time, most design viz tools – real-time and those that generate photorealistic stills and animations – are mostly about the creation of the asset with little to no attention paid to how that asset will be for collaborative design review.
Collaboration with viz-focused AEC assets often boils down to simple file exchange, whether that’s sending an attachment via email or sharing a game engine executable over Dropbox. AEC software developer CL3VER takes a different approach by providing a browser- based workspace for sharing, viewing and commenting on visually rich interactive models that are rendered in real time with ray tracing, global illumination and reflections.
The company’s new software release, CL3VER 3D, is billed as an interactive presentation tool, but the software also allows collaboration over the web using simple annotation tools.
The beauty of CL3VER 3D lies in its simplicity. It features a push-button workflow, so can be used by literally anyone. There is no need for any specialist design viz knowledge. All of the scene preparation is done in the background, as the software automatically brings across geometry, cameras, materials and lights, as defined in the 3D authoring tool.
CL3VER 3D comes with plug-ins for Revit, Rhino, SketchUp and 3ds Max and automatically maps each application’s materials to CL3VER materials. In 3ds Max, the software also supports V-Ray shaders which, according to the developers, gives the best quality results.
Chaos Group, the company behind V-Ray, actually invested €2 million in CL3VER last year, so expect the photorealistic rendering engine to be more tightly integrated into CL3VER 3D in the future.
Workflow from Revit
We tested the software with Revit 2018. In terms of the process to follow, first install the Revit plug-in, then generate a CL3VER model by picking a 3D view, clicking the CL3VER tab and then export. A single Revit 3D view is good for a quick visualisation, but for a more structured presentation, you can choose any number of 3D views. We did find an issue with the software here, in that you first have to open some (if not all) of the 3D views in Revit before you export the file, otherwise Revit will crash. CL3VER said this issue can be resolved by installing Revit 2018.1. However, as we were using a Revit 2018 trial license and cannot install service packs, we could not verifiy this.
Export is compute-intensive, but makes use of all the available CPU cores inside your workstation. On our Quad Core HP Z2 Mini, it took about 40 seconds to export a single 3D view from Revit’s Basic sample project. However, expect to wait longer for more complex models or when exporting more than one view.
Once exported, the model appears in the CL3VER 3D Viewer, a desktop application that acts like a holding zone for models. It’s here that you do all your model prep for your presentation, but be careful not to close the application before you upload your model to the cloud or save to your desktop, or you’ll lose all of your work. Pay attention here: you are not given any warning of this when you press the close button in the top right of the Window!
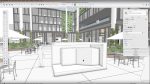
The first thing you’ll notice is the interface is very sparse, with two menus that pull out from the bottom and the right-hand side of the screen.
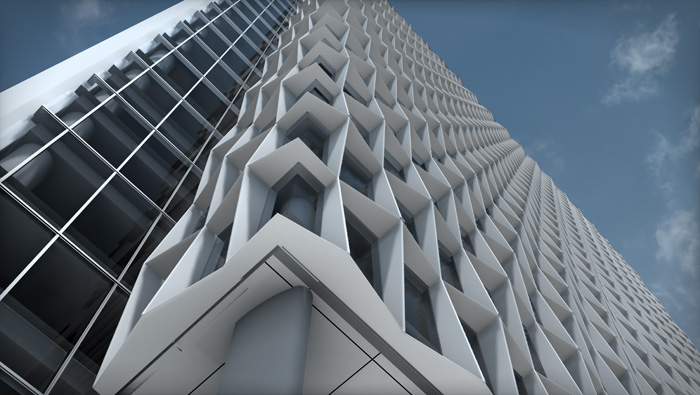
The model is initially displayed in ‘clean mode’, which is ray traced with ambient occlusion. The visual quality is good, much better than viewing the same model inside Revit. However, switching to ‘realistic mode’ turns on Global Illumination (GI), which adds indirect light to the scene and can improve quality significantly, particularly with interiors. [With 3ds max and V-Ray, CL3VER says the quality in realistic mode is very similar to that of V-Ray RT, although we did not test this.]
You can also control graphics quality by choosing between low, medium, high or best. The higher settings render the scene with softer shadows but low still looks good.
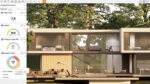
Of course, visual fidelity is heavily dependent on the power of your workstation’s GPU. The software, which uses WebGL, needs a powerful graphics card in order to be able to interact with models smoothly. Our HP Z2 Mini, which has an entry-level Nvidia Quadro M620 GPU, performed OK at FHD (1,920 x 1,080) resolution in clean display mode at medium quality, but was notably underpowered when turning on realistic mode at high quality, making it very hard to navigate the scene.
We then swapped to a workstation with a high-end Quadro P5000 GPU and found we could navigate the building in realistic mode and best quality with only a very minor lag. Ideally, you’d need a minimum of Quadro P4000 or GeForce GTX 1070.
CL3VER can also run on lower powered hardware, even Intel-integrated graphics, not just by dialling down the quality settings, but also by lowering the resolution inside the app and reducing pixel density. However, this makes the model appear a little blurred so is not ideal, particularly as the software is all about visual quality.
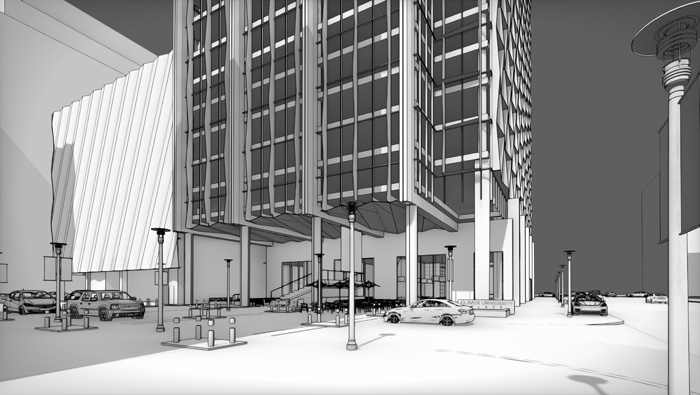
Another way to increase performance is to change the display option from a fully textured model to one that is greyscale. Sketch mode in CL3VER features lines and shadows with an ambient occlusion pass and is a great way of presenting buildings in the early stages of development. For a really simplistic render style, there’s also outline mode.
Daylight settings, based on the Revit sun, can also be changed in real time to see how the building would look throughout the day at different times of the year. Depending on how the Revit model has been organised, you can also break it down by discipline – for example, architectural, structural, and so on.
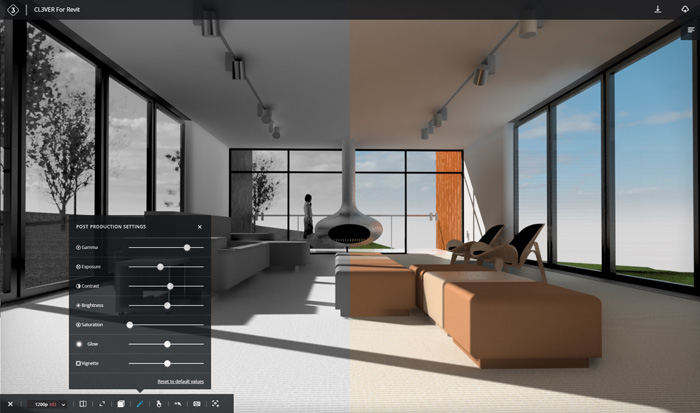
To fine-tune how the model is displayed, CL3VER 3D also includes a number of post-production settings, such as contrast, brightness, glow and exposure.
Adding narrative
Once you’re happy with the way your scene looks, you can then turn it into an interactive presentation to show off specific parts of the project. Real-time viz engines are great, as they give complete freedom to explore the building, but it’s also important that clients or collaborators get to see exactly what you, the designer, want them to see.
The Guided Tour tool lets you set up a series of important views that can be used to step others through the project. Simply move the model into position using the mouse (left button rotates the camera view, right button pans, scroll wheel zooms in and out) then add a title and notes to each view.
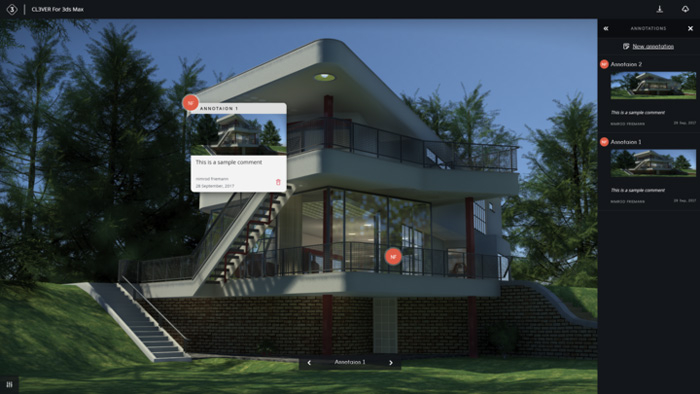
Annotations that move with the model can also be added in the 3D space, highlighting areas of interest, or those that need attention or approval. Each annotation includes a thumbnail image (the default view or a custom image) as well as author and time. They appear in list form in the right-hand menu and as a circular icon in the 3D model (with the initials of the author).
Collaborative workflow
Once the model is ready to share, it’s time to save it. You can choose to do this locally if you simply want a quick presentation for the office or on site where there is no internet connection. However, the real power of CL3VER comes into to play when uploading the model to your cloud workspace to share with others.
File sizes vary according to the size/complexity of the project, but for an average Revit model, you can expect it to come in under 100MB, which doesn’t take long to upload on a good connection.
Once uploaded, the model appears in the CL3VER Workspace (on CL3VER.io), an environment that looks much like Google Drive. From here, you can store all of your projects and can edit, share and open models directly.
Any WebGL-enabled browser is technically supported, but CL3VER recommends Firefox, Safari or Chrome. [We had a few issues with Edge on Windows 10, where models hung when opening, so we switched to Chrome.]
To share a presentation, simply click on the three dots in the top right of the project window, then add email address and permissions (edit, comment or view).
The collaborator will then be sent a notification email. This collaborator simply clicks the link, punches in their email and password and can then start viewing and commenting on projects immediately in a web browser. They don’t need a plug-in or to pay a license fee.
Depending on permissions, viewing a project in a browser is virtually the same as viewing a model in the CL3VER viewer.
The model appears with the visual settings that have been assigned by the author, but none of these are set in stone. Participants have full control over how the model is displayed.
Navigation can be completely free (there is no physics to stop you walking through walls), or as part of a Guided Tour. Users can also click buttons within the scene that relate to 3D views, elevations, sections and plans that have been imported with the Revit model.
Annotations are the main method of communication and can be viewed from the right-hand menu, or by clicking the initialled icons in the model itself. More annotations can be added to the model, depending on permissions.
The annotation tool as a means of supporting collaborative design review is pretty basic at the moment and there is certainly room for improvement.
First, additional notes can’t be added to existing annotations, which would be useful for maintaining the conversation between participants.
Second, any annotations that are added are not automatically made visible to others and can only be seen by closing the model and reloading it. If you’re participating in a real time distributed design/review session, this is quite clunky.
Third, there is no way to track issues. The only way to do this currently is to either have a great memory or to delete annotations from the scene – but then you have no audit trail.
Finally, it would be good for project participants to get notifications of any changes that have been made to the project, be it a model update or a new annotation. It would be even better if tasks could be assigned to specific users.
We raised all of these points with the CL3VER development team and the good news is that all of these issues are being implemented in the roadmap. We were also told that “annotations” will be re-named as “comments”.
In order to resolve any issues raised in design/review, edits must be done in the 3D authoring tool and then the model re-exported. When uploading to the CL3VER workspace, users have the option of overwriting an existing project or creating a new one.
Use the overwrite option if you want to keep annotations from previous versions. These remain in the model even if the geometry, materials or lights have changed.
Virtual Reality (VR)
In addition to viewing projects on a 2D display, CL3VER also support immersive VR through the Oculus Rift and HTC Vive. This isn’t the fully interactive experience offered in applications such as Enscape, Autodesk Revit Live or Iris VR Prospect, where you can walk or teleport around a building. Instead, the software allows you to generate 360 cube maps, which give you a VR experience from a set location.
360 cube maps are generated on the fly, in around 15 to 20 seconds. So, users are able to navigate freely, or use cameras or 3D views to take the client along a set path. Cube maps can be rendered in any of the modes – realistic for the best quality or sketch to experience VR in a more schematic way.
VR can be accessed in two ways: Either direct from Revit by clicking the VR button in the CL3VER tab; or from the CL3VER viewer. VR is not accessible through a browser.
Unfortunately, in our tests, while we could see the cube maps appear on screen in a render window, we could not get them to display on our Oculus Rift headset. CL3VER said this issue should also be resolved by installing Revit 2018.1.
Conclusion
CL3VER started out life as a browser-based AEC presentation tool for design viz specialists. The workflow was largely manual and required users to rebuild lights, materials and cameras every time a new model was imported. This time-consuming workflow made it more suited to projects in the latter stages of the design process when details are pretty much set in stone.
With this new release, the focus has changed completely. The import process is fully automated, which not only makes it easy for architects and engineers to use, but also more suited to design/review workflows, rather than simply for creating and sharing polished presentations.
While the developers have done a good job automating the model export process, there is still some work to do to make the product properly ready for design/review. Annotation tracking, notifications and real-time updates should improve workflow dramatically, over and above the benefits of moving away from file-based transfer. The developers are also looking at ways to expose BIM data within the model, a common capability in many BIM collaboration tools.
These changes certainly open up the software to a much wider audience, but there is still a challenge when it comes to hardware. Your average architect or engineer is unlikely to have access to the kind of workstation required to get the most out of the software. CL3VER 3D will run on a typical GPU for Revit, like the Quadro M620, but you really need something more powerful, especially if you want to use it for VR.
A new release of CL3VER is due any day and we are promised there will be some major new features. This is a good first step into aesthetically focused collaborative design review and, while there are some issues to iron out, it’s definitely one to follow in the future. There’s a free trial so you can try it out for yourself.
■ Price starts at $40/month
If you enjoyed this article, subscribe to AEC Magazine for FREE